 Onwe Damian Chukwuemeka
I’ll be honest – managing money used to feel like a constant juggling act. There were bills, unexpected expenses, and the ever-present question of where my money was going. Sound familiar?
If it does, then you’re probably no stranger to the stress of financial uncertainty. For me, the turning point came when I decided to create a budget binder, and I’ve never looked back since. This simple tool gave me the clarity I desperately needed and helped me take charge of my finances in ways I never imagined possible.
In this post, I want to share how I set up my budget binder from scratch. Whether you’re just starting to organize your finances or you’re looking to fine-tune your budgeting system, this guide will walk you through the essentials.
I’ll break it down into easy-to-follow steps so that you can stay organized and make steady progress toward your financial goals, whether it’s paying off debt, saving for the future, or simply knowing exactly where your money is going.
Why a Budget Binder is a Game-Changer for Financial Organization
Before we dive into the details, let me tell you why a budget binder is so crucial. I used to think that tracking everything on my phone or in apps was enough – but I was wrong. There’s something about having a physical binder that helps me really commit to managing my finances. Plus, you can organize it in a way that makes sense for you, which is exactly what I’ve done.
Here’s why I believe a budget binder works:
-
Everything in One Place: Bills, receipts, savings goals – it’s all there, neatly organized.
-
Clarity at a Glance: Instead of searching through multiple apps or documents, I can quickly look at my binder and see where I stand.
-
Accountability: It’s hard to ignore an overdue bill or missed savings target when it’s staring at you in your binder. It helps keep me honest about my financial habits.
-
Complete Customization: You can tweak your binder to match your unique financial situation. Need more space for savings? Add a section. Need to track investments? No problem.
Related: $5 Budget Challenge: How I Saved $10,000 in Just 3 Months
What You’ll Need to Set Up Your Budget Binder
Setting up your budget binder doesn’t have to be complicated. The beauty of it is that you can make it as simple or detailed as you want. I kept things fairly straightforward, but you’ll find that as you go, you can customize it to suit your style.
Here’s a list of what you’ll need:
-
A 3-ring binder: I went with a 2-inch binder, but if you have a lot to organize, go bigger.
-
Dividers: These will help you separate different sections in your binder for easy access.
-
Budget sheets or printables: There are tons of free resources online that I found useful for tracking everything from income to expenses and savings goals.
-
Pocket folders: Perfect for storing receipts, bills, or anything you need to keep.
-
Pens, highlighters, and sticky notes: These are great for jotting down reminders or marking important information.
Related: How To Create A Budget For Beginners
How to Set Up Your Budget Binder (Step-by-Step)
Now, let’s get into the fun part – setting up your binder! I’m going to walk you through the process I used, but feel free to adjust it based on your own needs.
Step 1: Organize with Dividers
The first thing I did was use dividers to create sections for different areas of my finances. This part is entirely up to you, but here’s how I divided mine:
-
Income: I track all my income sources here, from salary to side gigs.
-
Expenses: This is where I track my monthly expenses. I split them into fixed (like rent) and variable (like groceries) to see where I can cut back.
-
Bills: I created a section just for bills. I like to keep a record of due dates, amounts, and payments for easy reference.
-
Savings Goals: For things like building an emergency fund or saving for a trip, this section helps me track my progress.
-
Debt: If you’re paying down debt, I’d recommend creating a section just for that. I track everything from credit card balances to student loans.
-
Receipts: I keep physical receipts here for easy access whenever I need them.
The goal is to make it easy to find what you need without flipping through pages of clutter.
Related: The 50 30 20 Budget Rule Explained
Step 2: Add Budget Sheets or Printables
Next, I added budget sheets to each section. I use printable forms that I can fill out each month. These budget sheets help me track:
-
Monthly Budget Planner: To plan out my expected income and expenses for the month.
-
Expense Tracker: For tracking every single purchase I make so I can see where my money’s going.
-
Debt Repayment Tracker: I created a simple tracker to help me stay on top of paying off my debts.
-
Savings Tracker: This is where I can see how much I’ve saved for different goals.
Using these forms has helped me stay organized without feeling overwhelmed by the numbers. I update them regularly to make sure I’m staying on track.
Related; 6 Biweekly Budget Planner
Step 3: Create a Bill Tracker
Bills are one of the most critical parts of any budget, so I created a dedicated bill tracker. I included the following columns:
-
Bill Name
-
Due Date
-
Amount Due
-
Amount Paid
-
Payment Confirmation Number
This simple tool helps me track payments, avoid late fees, and ensures I’m paying bills on time.
Step 4: Set Up a Savings Tracker
In my savings section, I’ve broken down my savings goals into smaller, more manageable amounts. If I’m aiming to save $1,000 for an emergency fund, I set a target amount for each month. As I save, I update the tracker. Keeping it visual is key – it’s motivating to see your progress!
Related; 8 Effective Ways to Cut Down Your Budget
Step 5: Include a Debt Tracker
If you’re tackling debt, you’ll want to have a debt tracker in your binder. This helps you keep track of:
-
Debt Name
-
Total Amount Owed
-
Interest Rate
-
Monthly Payment
-
Remaining Balance
Watching the balance shrink each month is motivating and helps you stay committed to paying it off.
Tips for Keeping Your Budget Binder on Track
Once your budget binder is set up, the work isn’t over. Maintaining it is key to staying organized and sticking to your financial goals. Here are some tips to help you stay on top of things:
-
Review Regularly: I make it a habit to review my budget binder once a week. It keeps me accountable and lets me catch any mistakes early.
-
Color-Code: I color-code my expenses to quickly identify where I’m spending the most. For example, I use red for bills, green for savings, and yellow for personal expenses.
-
Update When Needed: Life changes, and so do budgets. If my income or expenses change, I update my budget binder immediately.
-
Set Realistic Goals: Make sure your savings goals and debt repayment plans are achievable given your current financial situation.
Conclusion
Setting up a budget binder has truly changed the way I manage my finances. It’s helped me stay organized, motivated, and in control of my spending and saving. Whether you’re trying to save for something big or just want to get a better handle on your monthly expenses, having a budget binder will help you reach your goals with less stress and more clarity.
I hope this guide inspires you to create your own budget binder. Trust me, once it’s set up and you see your progress, you’ll wonder why you didn’t do it sooner. So, grab your supplies and start organizing your financial future today!
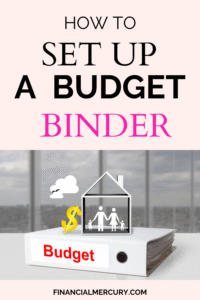
Save the pin for later

- How to Buy AdZilla on Solana - February 18, 2026
- How to Make Money Last in Retirement - January 8, 2026
- How to Save for Christmas - November 30, 2025